You’ll have seen a modal controller in action many times when using
your iPhone. A view slides in from the bottom of the screen and is usually
dismissed with a Done button at the top of the screen. When dismissed, it
slides back down the screen, disappearing at the bottom.In the main controller we would generally have a button or other UI
element; tapping this would trigger an event linked to the following
method in the view controller, which would bring up the modal view:
-(void)openNewController:(id)sender {
    OtherController *other = [[OtherController alloc] init];
    [self presentModalViewController:other animated:YES];
    [other release];
}
In the modal view itself, we would implement a button or some other
way to close the view, which would call this method in the view
controller:
-(void)doneWithController:(id)sender {
    [self dismissModalViewControllerAnimated:YES];
}
This dismisses the current modal view.
1. Modifying the City Guide Application
The best way to explain the modal view is to show it in action.
For that we’re going to go back to the City Guide
application we built in this article. We’re going to make some
fairly extensive changes to it, so you should make a copy of the project
first and work with the copy while you make your modifications. In this
section, I’ll show you how to take your code apart and put it back
together again in an organized fashion. This occurs a lot when writing
applications, especially for clients who have a tendency to change their
mind about what they want out of the application in the first
place.
Open the Finder and navigate to the location where you saved the
CityGuide project; see Figure 1.

Right-click or Ctrl-click on the folder containing the project
files and select Duplicate. A folder called CityGuide
copy will be created containing a duplicate of our project.
You should probably rename it to something more sensible. I suggest
CityGuide2. Now open the new version of the project
in Xcode and select Project→Rename from
the Xcode menu bar. Enter CityGuide2 when
prompted and click on the Rename button to rename the project.
In this article, we built an
application that lets users both add and delete city entries in our
table view. Adding the functionality to delete table view cells was
fairly simple; the complicated part was adding the ability to add
cities. So, let’s take a step back and look at another way to implement
that functionality.
First we’re going to go into the RootController implementation and back out of
the changes that allowed users to edit the table view. We’re going to
replace the Edit button and the associated implementation with an Add
button, reusing the AddCityController
code and associated view, but presenting the Add City view modally
instead of using the navigation controller.
You may wonder about deleting lots of perfectly good code, but
refactoring functionality like this is a fairly common task when you
change your mind about how you want to present information to the user,
or if the requirements driving the project change. This is good practice
for you.
Note:
If you want to do a global find (and replace) over the entire project for a
word or phrase you can do so from the Edit menu. Selecting Edit→Find→Find in
Project will bring up the Project Find window.
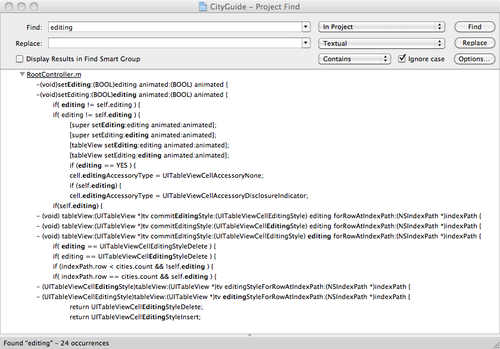
To remove functionality like this, first you need to figure out
what needs to be removed. If you don’t know the author of the original
application this can sometimes be difficult. Do a project-wide search
for “editing”, as shown in Figure 2. If you do that
you’ll see that the only mention of “editing” is in the
RootController.m file. The changes we’ll need to
make are actually fairly tightly constrained inside a single class.
We’ll have to make some minor changes elsewhere in the project. Limiting
the scope of necessary changes when refactoring code in this way is one
of the main benefits of writing code in an object-oriented
manner.
Open the RootController.m file in Xcode.
Begin the refactoring by deleting the following methods in their
entirety:
Note:
Remember that the methods as they appear in the file have
longer, more complicated names.
For example, setEditing:animated:
is (void)setEditing:(BOOL)editing
animated:(BOOL) animated.
Next, do the following:
In the viewDidLoad: method,
remove the line that adds the self.editButtonItem to the navigation
bar.
In the tableView:cellForRowAtIndexPath: method,
remove the section enclosed in the if(
self.editing ) { ... } conditional statement, and the
else { ... } statement that adds
the “Add New City...” cell. Additionally, you should remove the line
that sets the editingAccessoryType inside the
conditional statement.
Similarly, remove the if( self.editing ) { ...
} conditional statement in the tableView:numberOfRowsInSection:
method.
Finally, in the tableView:didSelectRowAtIndexPath: method
remove the &&
!self.editing expression from the first if block. Remove the second if block (which deals with what happens if
we are editing) in its entirety.
We’re done. If you do a global find in the project for “editing”
you should now come up blank, and the class should appear as shown
here:
#import "RootController.h"
#import "CityGuideDelegate.h"
#import "City.h"
#import "CityController.h"
#import "AddCityController.h"

@implementation RootController

@synthesize tableView;

#pragma mark UIViewController Methods

- (void)didReceiveMemoryWarning {
    [super didReceiveMemoryWarning];
}

- (void)viewDidLoad {
    self.title = @"City Guide";
    CityGuideDelegate *delegate =
     (CityGuideDelegate *)[[UIApplication sharedApplication] delegate];
    cities = delegate.cities;
}

- (void)dealloc {
    [tableView release];
    [cities release];
    [super dealloc];
}

#pragma mark UITableViewDataSource Methods

- (UITableViewCell *)tableView:(UITableView *)tv
   cellForRowAtIndexPath:(NSIndexPath *)indexPath
{
    UITableViewCell *cell =
     [tv dequeueReusableCellWithIdentifier:@"cell"];
    if( nil == cell ) {
        cell = [[[UITableViewCell alloc]
         initWithFrame:CGRectZero reuseIdentifier:@"cell"] autorelease];
    }

    if (indexPath.row < cities.count ) {
        City *thisCity = [cities objectAtIndex:indexPath.row];
        cell.textLabel.text = thisCity.cityName;
        cell.textLabel.textColor = [UIColor blackColor];
     }
    return cell;
}

- (NSInteger)tableView:(UITableView *)tv
  numberOfRowsInSection:(NSInteger)section
{
    NSInteger count = cities.count;
    return count;
}

#pragma mark UITableViewDelegate Methods

- (void)tableView:(UITableView *)tv
  didSelectRowAtIndexPath:(NSIndexPath *)indexPath
{
    CityGuideDelegate *delegate =
     (CityGuideDelegate *)[[UIApplication sharedApplication] delegate];

    if (indexPath.row < cities.count ) {
        CityController *city =
          [[CityController alloc] initWithIndexPath:indexPath];
        [delegate.navController pushViewController:city animated:YES];
        [city release];
    }
    [tv deselectRowAtIndexPath:indexPath animated:YES];
}

@end
Since you’ve now made fairly extensive changes to the view
controller, you should test it to see if things are still working. Click
the Build and Run button on the Xcode toolbar, and if all is well you
should see something very similar to Figure 3. Tapping on one of
the city names should take you to its city page as before.
We’ve deleted a lot of code, so let’s write some more. In the
viewDidLoad: method we need to
replace the Edit button that we deleted with an Add button.
Let’s add a button of style UIBarButtonSystemItemAdd and set things up so
that when it is clicked it will call the addCity: method in this class. Add the
following code to the viewDidLoad:
method:
self.navigationItem.rightBarButtonItem = [[UIBarButtonItem alloc]
  initWithBarButtonSystemItem:UIBarButtonSystemItemAdd target:self
  action:@selector(addCity:)];
Since there isn’t an addCity:
method right now, we need to declare it in the
RootController.h interface file. Open that file,
and add this line after the @interface {
...}@end directive: declaration but before the
- (void)addCity:(id)sender;
Now add the implementation to the
RootController.m file:
- (void)addCity:(id)sender {
    AddCityController *addCity = [[AddCityController alloc] init];
    [self presentModalViewController:addCity animated:YES];
    [addCity release];
}
This looks almost identical to the snippet of code I showed you at
the beginning of this section, but the modal view we’re going to display
is the one managed by our AddCityController class.
Now we need to make a couple of small changes to our AddCityController class. Open the
AddCityController.h interface file in Xcode and
declare the saveCity:IBAction. Add this line after the
@interface { ... } statement but
before the @end directive: method as an
- (IBAction)saveCity:(id)sender;
Open the implementation file
(AddCityController.m), and remove the last line
(where we pop the view controller off the navigation controller) and
replace it with a line dismissing the modal view controller. You’ll also
change the return value of the saveCity: method from void to IBAction here just as you did in the interface
file:
- (IBAction)saveCity:(id)sender {
    CityGuideDelegate *delegate =
      (CityGuideDelegate *)[[UIApplication sharedApplication] delegate];
    NSMutableArray *cities = delegate.cities;

    UITextField *nameEntry = (UITextField *)[nameCell viewWithTag:777];
    UITextView *descriptionEntry =
                       (UITextView *)[descriptionCell viewWithTag:777];

    if ( nameEntry.text.length > 0 ) {
        City *newCity = [[City alloc] init];
        newCity.cityName = nameEntry.text;
        newCity.cityDescription = descriptionEntry.text;
        [cities addObject:newCity];

        RootController *viewController = delegate.viewController;
        [viewController.tableView reloadData];
    }
    [self dismissModalViewControllerAnimated:YES];

}
We’re pretty much there at this point; however, before we finish
with our changes here we also need to go up to the viewDidLoad: method and delete the lines where
we add the Save button to the view (it’s a single statement beginning
with self.navigationItem.rightBarButtonItem that
spans multiple lines).
Make sure you save the changes you made to the AddCityController class, and open the
AddCityController.xib file inside Interface
Builder.
First, drag and drop into the view a navigation bar (UINavigationBar) from
the Library window (select Cocoa Touch→Windows, Views & Bars). Position it at the
top of the view, and resize the table view so that it fits in the
remaining space. While you’re there, change the title of the navigation
bar from “title” to “Add New City”.
Next, drag and drop a bar button item (UIBarButtonItem) onto
the navigation bar and position it to the left of the title. In the
Attributes Inspector (⌘-1) change the Identifier from Custom to Done.
You’ll see that this changes both the text and the style of the
button.
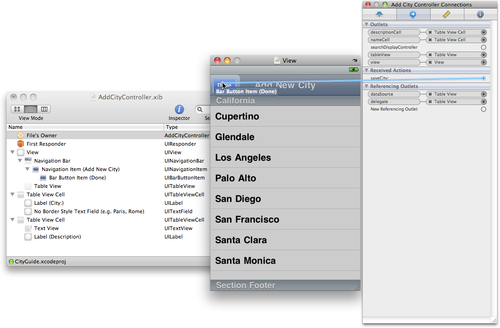
Finally, click on File’s Owner in the AddCityController.xib window
and switch to the Connections Inspector (⌘-2). Connect the saveCity: received action to the Done button,
as I’ve done in Figure 6-15. Save your changes
to the NIB file, as we’ve now finished refactoring our City Guide
application.
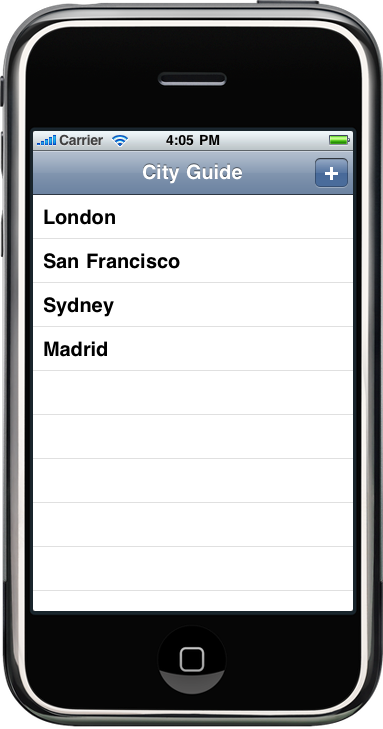
Click Build and Run on the Xcode toolbar to compile and start the
application in iPhone Simulator. When the application starts you should
see something like Figure 6-16. Clicking the Add
button in the navigation bar should bring up our “Add City” view; when
it does, enter some information and click Done. You should see your test
city appear in the main table view.
Well done. We’ve just taken the City Guide application apart, put
it back together again, and made it work slightly differently. But what
if you disliked the way we implemented the ability to add cities in the
first version of the application, preferring this approach, but you
still want to retain the ability to delete cities? You could still
implement things so that a left-to-right swipe brought up the Delete
button for the row; for instance, Apple’s Mail application that ships
with the iPhone and iPod touch takes this approach. Just adding the
following method back into RootController.m will
reimplement this functionality:
- (void) tableView:(UITableView *)tv
  commitEditingStyle:(UITableViewCellEditingStyle) editing
   forRowAtIndexPath:(NSIndexPath *)indexPath {
    if( editing == UITableViewCellEditingStyleDelete ) {
        [cities removeObjectAtIndex:indexPath.row];
        [tv deleteRowsAtIndexPaths:[NSArray arrayWithObject:indexPath]
          withRowAnimation:UITableViewRowAnimationLeft];
    }
}